Using a guillotine paper trimmer isn't hard, so why aren't you getting the results you need? Botched job after botched job may leave your confidence level lying on the chopping block.
But don't worry -- you're not alone.
You, like many others who work in the print field, might be missing some small, yet critical, steps when using your paper trimmer.
But we can help you there.
Here's a rundown of what you can do to get the best results with your guillotine paper trimmer time and time again.
Let's get started!
Why a Guillotine Paper Trimmer?
A guillotine paper trimmer is ideal if you have to a cut a single sheet or 10 sheets at most.
For instance, this machine works best for a professional photographer, as other higher-volume paper cutters would be overkill.
Still, if you get uneven edges when you trim 10 sheets at the same time, you may have to reduce the number of papers you cut in a single job.
Sheet Counting
First, to properly use a guillotine paper trimmer, count how many sheets of paper you want to cut. Then, make sure your trimmer can handle them all.
Every paper trimmer has its own cutting capacity. If you try to trim too many papers at once, you'll dull the machine's blade in no time.
Plus, you'll end up with those annoying rough edges. And let's face it: being rough around the edges isn't exactly a welcome sight.
Separate your large pile of paper into several smaller ones to make your job easier if necessary.
Cutting Base
Once you figure out how many pieces of paper you can cut at once, place this stack of paper on your machine's base.
Your base usually has a cutting guide or measurement grid on it. Take advantage of these features if you have to make a unique cut -- like one that's angled -- or if you need to measure your sheets.
If your machine features a paper clamp, use it to hold your papers still during the cutting job. The key is to work smarter, not harder.
Cutting
Papers are in a reasonably sized stack? Check.
Papers are in place? Check.
Now comes the cutting. First, bring your machine's blade down carefully; keep your hands away from it to avoid accidentally cutting yourself.
Then, cut your paper stack, securing the blade with the machine's blade latch when you finish. It will keep the blade from crashing down or going up unexpectedly.
Finally, recycle all paper scraps. Repeat this process each time you use a guillotine paper trimmer.
Additional Tips and Warnings
Guillotine paper trimmers have an impressive track record. They can last a long time and are designed for precision.
But the guillotine paper trimmer isn't something to handle lightly.
Here are a couple of additional pointers that can keep your project from being a waste of time.
First, before you cut your real paper on the device, test it out with scrap paper to ensure you're doing things correctly.
Second, never remove or adjust your trimmer's safety features, unless you want to lose some fingers.
We wouldn't recommend it though.
Skewed Paper
If the world were perfect, every sheet of paper you decided to cut would be perfectly square.
Unfortunately, we don't live in a perfect world. You may have to deal with cheap paper, paper that becomes distorted during your printing job, or paper stored incorrectly.
Welcome to the dark reality of the near impossible cutting job.
But fear not. A few easy tricks will help you to cut even skewed paper successfully.
First, purchase a wedge made out of hardwood, and place it in the back gauge of your cutting machine where your device's side guide normally pulls a sheet of paper.
Then, put magnetic strips where your machine's grippers normally grab the sheet. Make sure that both the hardwood wedge and the magnetic strips go to your cutter table's bottom so the sheets don't slide underneath.
Finally, rotate your stock to get rid of the tail on the sheet opposite your machine's gripper. In this way, you now have two square edges with which to work.
After that, finish the job normally.
Hopefully, you don't have to employ this technique too often, but if you need it, it can be a big help.
Maintenance
As with any machine you use for your business, giving it some regular TLC will keep it functioning at its highest level.
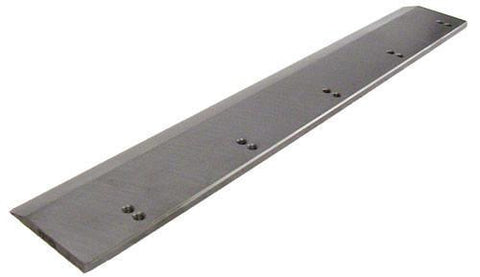
If you neglect the cutter's blades, you may end up doing expensive reruns. That's because a dull blade no longer cuts: it smashes.
How do you know if your blade is too dull? Here are a few warning signs to watch out for:
- Chipped or rough cutting edge
- The sound of banging during cutting
- Cut material that sticks together
- Cut edges that are turned down or ridged
- Cutting inaccuracies, such as undercuts and overcuts
Change your blades after about 40 hours of trimming paper. That way, you won't have to deal with a dull blade and its unwanted consequences.
In addition, some basic lubrication will help keep your device operating smoothly. For instance, change the machine filters and oil every 2,000 hours of the machine's use.
Otherwise, your oil will break down. And when your machine stops working properly, so will you.
How We Can Help
We offer a wide range of high-quality cutters and trimmers to suit your business's needs.
Contact us to find out more about our various machines. We'll help you find one suited to your cutting goals.
We can't wait to hear from you.


